
Did you know millions of people worldwide use IPTV for entertainment? Streaming is getting popular, and having a good IPTV player is key. TiviMate IPTV Player, made by Armobsoft FZE, is a top pick. It’s known for its cool features and how it organizes things.
We want to make sure you have a great streaming time. So, we’re here to help you install TiviMate IPTV Player on your Windows 11. Watch your favorite TV shows and series easily!
Key Takeaways
- Learn how to install TiviMate IPTV Player on Windows 11.
- Discover the advanced features of TiviMate IPTV Player.
- Understand how to enhance your streaming experience.
- Get insights into the organizational settings of TiviMate IPTV Player.
- Enjoy a seamless streaming experience on your Windows 11 device.
Understanding TiviMate IPTV Player
TiviMate IPTV Player is a powerful tool for streaming your favorite TV shows and movies on Windows 11. It’s a top pick for IPTV fans because of its great features.
What is TiviMate IPTV Player?
TiviMate IPTV Player is a program that makes watching IPTV easy. It lets you manage many playlists, keep track of what you’ve watched, and save your favorite channels. A happy user said, “TiviMate has changed how I watch TV!”
Features and Benefits of TiviMate
The key features of TiviMate IPTV Player are:
- Support for many playlists
- Regular updates to the TV guide
- High-quality sound and video
- An easy-to-use interface with EPG support
- Advanced playback and recording options
These features make TiviMate a top choice for IPTV players.
Why Use TiviMate on Windows 11?
Using TiviMate on Windows 11 has many benefits. You get a bigger screen and can use Windows-specific features. The developers say, “TiviMate works great on many platforms, including Windows 11.”
With TiviMate on Windows 11, you get a better IPTV experience. It’s perfect for anyone who loves watching TV, whether you’re a casual viewer or a true IPTV fan.
Prerequisites for Installing TiviMate on Windows11
Before you start installing TiviMate IPTV Player on Windows 11, make sure your system is ready. We’ll show you what you need for a smooth setup.
System Requirements
Your computer needs to meet certain specs to run TiviMate IPTV Player well on Windows 11. These specs are key for the app’s best performance.
Minimum Hardware Specifications
The minimum requirements are:
- Microsoft Windows 7 or above
- Intel or AMD Processor
- At least 4GB RAM
- 10GB Free Disk Space
It’s important to check if your system has these minimum hardware specifications for TiviMate IPTV Player on Windows 11.
Recommended Hardware for Optimal Performance
For the best viewing experience, consider:
- A multi-core Intel or AMD Processor
- 8GB RAM or more
- A solid-state drive (SSD) with at least 20GB of free space
Using these recommended hardware specifications will make your TiviMate experience on Windows 11 even better.
Required Software Components
TiviMate IPTV Player is an Android app. To use it on Windows 11, you need an Android emulator. Popular options are BlueStacks, LDPlayer, and NoxPlayer. We’ll talk about these later.
A leading tech review says, “Choosing the right Android emulator is key for smooth Android app use on Windows.”
IPTV Subscription Requirements
To watch content on TiviMate IPTV Player, you need an active IPTV subscription. Make sure you have your IPTV provider’s login details ready before you start.
Setting up TiviMate on Windows 11 might seem tough. But by checking these prerequisites first, you’re off to a good start for a trouble-free setup.
Why TiviMate Requires an Android Emulator
TiviMate only works on Android, so you need an emulator to use it on Windows 11 PCs. It’s built as an Android app. This lets it use Android’s features for a smooth IPTV experience.
Understanding TiviMate’s Android-Only Limitation
TiviMate is made for Android. It uses Android’s setup and tools. But, it doesn’t work on Windows 11 by itself.
How Emulators Work to Run Android Apps on Windows
Emulators like BlueStacks and LDPlayer make a fake Android space on your Windows 11 PC. This lets you install and run Android apps, like TiviMate, on your computer. They make Android work on Windows.
Emulator Performance Considerations on Windows 11
Choosing the right emulator for TiviMate is key. Windows 11’s specs and the emulator’s quality affect how well it works. A good emulator for Windows 11 means less lag and better watching.
Knowing how emulators help run TiviMate on Windows 11 makes watching IPTV easier. You don’t need an Android device. This makes watching more flexible and enjoyable.
Top Android Emulators for TiviMate on Windows11
Choosing the right Android emulator is key for a great TiviMate experience on Windows 11. We’ll look at the best emulators for running TiviMate smoothly.
BlueStacks: Features and Compatibility
BlueStacks is a top Android emulator known for its speed and wide app compatibility. It provides a smooth TiviMate experience with features like:
- High-performance rendering
- Multi-instance support
- Regular updates with new features
BlueStacks is known for its easy-to-use interface and wide app support. It’s a great pick for TiviMate users.
LDPlayer: Performance and Usability
LDPlayer is a highly praised emulator for its performance and ease of use. It offers:
- Fast and stable performance
- Customizable controls
- Support for many Android versions
LDPlayer is great for gaming but also works well for TiviMate on Windows 11.
NoxPlayer: Benefits for IPTV Applications
NoxPlayer is a versatile emulator that’s great for IPTV apps like TiviMate. It has:
- A user-friendly interface
- High-performance rendering
- Support for keyboard and mouse controls
NoxPlayer’s flexibility and performance make it a top choice for TiviMate on Windows 11.
MEmu Play: Advantages for Streaming
MEmu Play is a strong Android emulator for streaming apps. Its benefits include:
- High compatibility with various Android apps
- Customizable settings for optimal performance
- Support for multi-instance management
MEmu Play offers a solid solution for TiviMate users, ensuring a smooth streaming experience.
By picking one of these top Android emulators, you can have a seamless TiviMate experience on your Windows 11 device.
How to Install TiviMate IPTV Player on Windows11
We will guide you through installing TiviMate IPTV Player on Windows11. You’ll use BlueStacks, a top Android emulator. It lets you run Android apps on your PC.
Downloading and Installing BlueStacks
First, download and install BlueStacks on your Windows11 PC. It’s a well-known Android emulator. It gives you a smooth Android experience on your computer.
Step-by-Step BlueStacks Installation Process
1. Go to the official BlueStacks website and download the latest version.
2. Run the installer after downloading. Follow the instructions to install BlueStacks.
3. Launch BlueStacks and wait for it to fully load.
Configuring BlueStacks for First Use
1. You’ll need to sign in with your Google account when you first launch. This is to access the Google Play Store.
2. Complete the sign-in process. If you don’t have a Google account, you’ll need to create one.
Setting Up BlueStacks for Optimal Performance
To get the best performance, adjust BlueStacks settings:
- Open the Settings menu in BlueStacks.
- Boost CPU and RAM for better performance.
- Enable “Enable Virtualization” if your PC supports it.
Installing TiviMate from Google Play Store
Now, install TiviMate from the Google Play Store with BlueStacks set up.
Signing into Google Play
If you haven’t signed in, open the Google Play Store app in BlueStacks. Sign in with your Google account.
Searching and Installing TiviMate
1. Search for “TiviMate IPTV Player” in the Google Play Store.
2. Click on TiviMate from the search results, then “Install.”
3. Wait for the installation to finish.
Installing TiviMate Using APK File
You can also install TiviMate using an APK file. This is useful if you have trouble with the Google Play Store method.
Finding a Reliable APK Source
1. Look for “TiviMate IPTV Player APK” on a trusted APK download site.
2. Download the latest version of the TiviMate APK.
Sideloading the APK into BlueStacks
1. Open BlueStacks and click on the “Install APK” button on the home screen.
2. Choose the downloaded TiviMate APK file and install it following the prompts.
By following these steps, you should have TiviMate IPTV Player installed on your Windows11 PC using BlueStacks. Enjoy your IPTV content on a bigger screen with the ease of a PC.
Installing TiviMate with LDPlayer on Windows11
Windows 11 users can run TiviMate IPTV Player smoothly with LDPlayer. LDPlayer is a well-known Android emulator. It provides a strong and feature-rich environment for running Android apps on Windows.
Downloading and Setting Up LDPlayer
To begin, download and install LDPlayer on your Windows 11 system. Here’s how:
Installation Steps for LDPlayer
- Go to the official LDPlayer website and download the latest version.
- Run the installer and follow the on-screen instructions to complete the installation.
- After installation, launch LDPlayer from your desktop or start menu.
Initial Configuration
After launching LDPlayer, you need to set it up for the best performance:
- Sign in with your Google account to access the Google Play Store.
- Adjust the performance settings according to your system’s specifications.
Configuring LDPlayer for TiviMate
To have a smooth experience with TiviMate, adjust LDPlayer’s settings:
- Increase the CPU and RAM allocation for better performance.
- Enable the “High” or “Ultra” performance mode.
Installing TiviMate on LDPlayer
You can install TiviMate on LDPlayer through the Google Play Store or an APK file.
Google Play Method
- Open the Google Play Store on LDPlayer.
- Search for “TiviMate IPTV Player” and click “Install.”
APK Installation Method
- Download the TiviMate APK from a trusted source.
- Enable “Unknown Sources” in LDPlayer settings.
- Install the APK by running the file.
By following these steps, you can successfully install TiviMate IPTV Player on Windows 11 using LDPlayer. You’ll enjoy a seamless IPTV experience.
Using NoxPlayer to Run TiviMate on Windows11
To enjoy TiviMate on Windows 11, try NoxPlayer. It’s an Android emulator that makes Android apps work well on Windows.
Installing NoxPlayer on Windows11
Download and Setup Process
First, download NoxPlayer from its official site. The setup is simple: just run the installer and follow the steps. NoxPlayer is easy to use, even for those who aren’t tech-savvy.
First-Time Configuration
When you open NoxPlayer for the first time, a wizard will guide you. It lets you adjust settings like performance and display quality. Getting NoxPlayer set up right is key for TiviMate to work well.
Optimizing NoxPlayer Settings for Streaming
NoxPlayer lets you fine-tune settings for better streaming. You can give NoxPlayer more CPU and RAM for smoother playback. Adjusting these settings can really boost TiviMate’s performance.
Getting TiviMate on NoxPlayer
Google Play Installation
You can get TiviMate from the Google Play Store in NoxPlayer. Just search for TiviMate, click install, and you’re set. This way, you get the latest TiviMate with all its premium features.
Manual APK Installation
Or, you can download the TiviMate APK file and install it manually. This is good if you want a specific version or if Google Play Store issues come up. Manual installation lets you choose the app version you want.
By following these steps, you can run TiviMate on Windows 11 with NoxPlayer. You’ll get a great IPTV experience on a bigger screen.
Setting Up TiviMate After Installation
After installing TiviMate on your Windows 11, it’s time to set it up. We’ll guide you through the process. This way, you can enjoy your IPTV services easily.
First-Time Configuration Wizard
When you open TiviMate for the first time, a configuration wizard will welcome you. It’s designed to make the setup easy. This lets you start streaming your favorite channels quickly.
Adding Your IPTV Provider
To use your IPTV services, you need to add your provider details to TiviMate. We support many ways to add your provider. This ensures compatibility with various IPTV services.
M3U Playlist Method
You can add your IPTV provider using an M3U playlist. Just get the M3U URL from your provider and enter it in TiviMate. This method is easy and widely supported.
Xtream Codes Method
If your provider uses Xtream Codes, enter your Xtream Codes details in TiviMate. This method is simple and helps manage your IPTV subscriptions well.
Configuring EPG (Electronic Program Guide)
An Electronic Program Guide (EPG) is key for a great viewing experience. It shows current and upcoming TV programs. To set up EPG in TiviMate, get the EPG URL from your provider and enter it in the app’s settings.
Customizing the TiviMate Interface
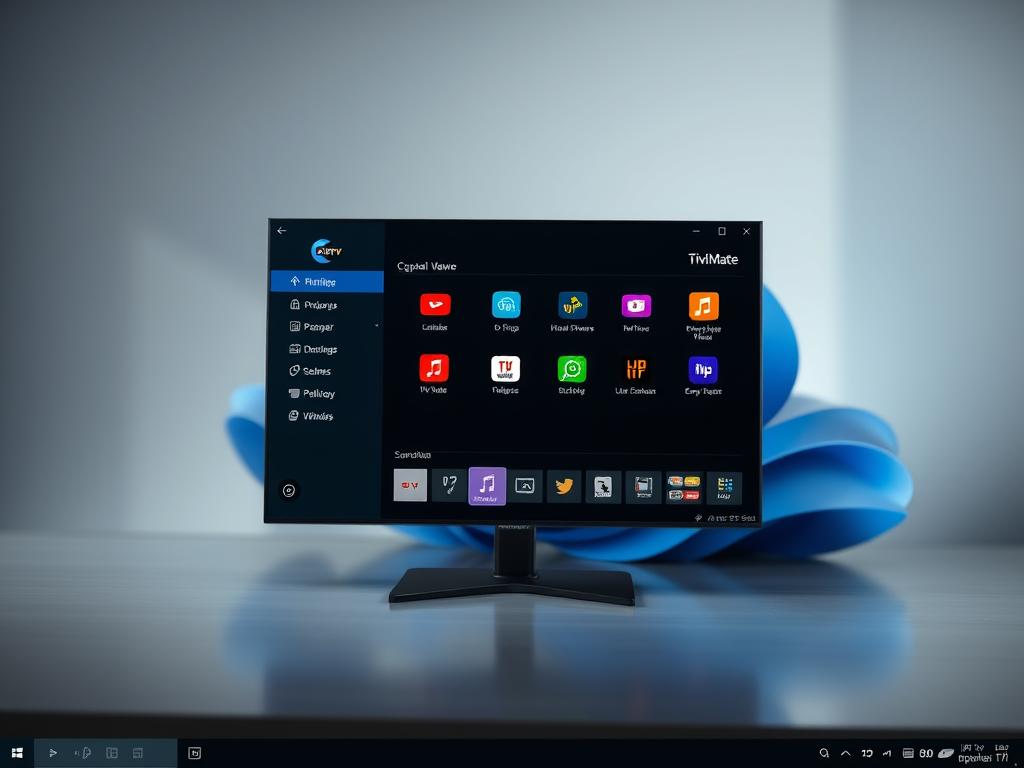
TiviMate lets you customize its interface to your liking. You can change the theme, layout, and organize your channels for easier access.
Theme and Layout Options
TiviMate offers many theme and layout options. You can personalize your viewing experience. Whether you like a dark theme or a specific channel arrangement, TiviMate has you covered.
Channel Organization
Organizing your channels is important for quick access to your favorite shows. TiviMate lets you create custom channel lists and favorites. This makes navigating your channels easier.
By following these steps, you can enjoy a tailored IPTV experience on your Windows 11 PC with TiviMate. It’s great for both seasoned IPTV users and newcomers. TiviMate’s flexibility and features make it an excellent choice for your entertainment needs.
Managing TiviMate Premium Features on Windows11
To get the most out of TiviMate on Windows11, you need to know about its premium features. TiviMate has many features that make watching IPTV better. Upgrading to premium unlocks even more benefits!
Free vs. Premium Features Comparison
The free version of TiviMate is great, but premium offers more. Here are some key differences:
- More Player Skins: Choose from more player skins to customize your viewing.
- EPG (Electronic Program Guide) Support: Get better program navigation with enhanced EPG support.
- Multiple Playlists: Manage many IPTV playlists at once.
- Ad-Free Experience: Say goodbye to ads for a smoother experience.
How to Purchase TiviMate Premium
Buying TiviMate Premium is easy. You can do it through the in-app purchase or the companion app.
In-App Purchase Process
To buy premium through the app:
- Open TiviMate on your Windows11 device.
- Go to the settings menu.
- Choose “Purchase Premium” and follow the steps.
Companion App Method
You can also buy premium through the companion app:
- Download and install the companion app.
- Log in with the same account as your TiviMate app.
- Follow the app’s instructions to finish the purchase.
Activating Premium on Your Windows11 Installation
After buying TiviMate Premium, activation is easy. Make sure you’re logged in with the same Google account on your Windows11 device. TiviMate will then recognize your premium status and activate the features.

By following these steps, you can enjoy TiviMate Premium’s enhanced features on your Windows11 device. This will make your IPTV viewing experience even better!
Optimizing TiviMate Performance on Windows11
We can make TiviMate run better on Windows 11 by tweaking a few settings. It’s key to adjust both the emulator and TiviMate settings for a smooth stream.
Emulator Performance Settings
The emulator’s performance is key for TiviMate’s smooth operation on Windows 11. We need to focus on memory and CPU core settings.
Memory Allocation
Enough RAM is essential for the emulator. Aim for at least 4GB for smooth running. Your system’s specs might require more.
CPU Core Assignment
Using multiple CPU cores for the emulator boosts performance. Most CPUs have four cores or more. Using two or more cores can make TiviMate faster and video quality better.
TiviMate Internal Settings for Better Performance
TiviMate has settings to improve its performance. We can adjust buffer size and video quality.
Buffer Size Adjustments
Increasing the buffer size helps with buffering, but it adds latency. It’s good for slow internet but might slow down.
Video Quality Settings
Lowering video quality can help with stuttering or buffering. It’s a good option if your internet is slow.
Network Optimization Tips
A fast and stable network is vital for TiviMate’s performance. We should choose between wired and wireless and know how VPNs affect streaming.
Wired vs. Wireless Considerations
Wired Ethernet is usually faster and more stable than Wi-Fi. It helps avoid buffering and disconnections.
VPN Impact on Streaming Quality
VPNs can help avoid ISP throttling, but they can also slow down streaming. They need to be set up right to work well.
Troubleshooting Common TiviMate Installation Issues
Fixing TiviMate installation on Windows 11 is easy when you know what to do. Sometimes, setting up TiviMate can run into problems. We’ll show you how to solve common issues.
Emulator Crashes and Solutions
Emulator crashes can happen for many reasons. This includes memory problems or graphics driver issues.
Memory-Related Problems
If memory issues cause crashes, increase the emulator’s RAM in its settings. Make sure your Windows 11 has enough RAM for the emulator.
Graphics Driver Issues
Old graphics drivers can make the emulator unstable. Update your drivers to the latest version from your GPU’s website.
TiviMate Won’t Install or Launch
TiviMate might not install or launch on Windows 11. This could be due to compatibility problems or Google Play Services errors.
Compatibility Problems
Make sure your emulator works with TiviMate and is set up right. Some emulators need specific settings for certain apps.
Google Play Services Errors
Google Play Services problems can stop TiviMate from installing or running. Try updating Google Play Services in the emulator or reinstall the emulator.
Playback Problems and Fixes
Playback issues like buffering or audio/video sync problems can ruin your viewing experience.
Buffering Issues
Buffering might be due to slow internet or server problems with your IPTV provider. Check your internet speed and contact your IPTV provider if needed.
Audio/Video Sync Problems
Audio and video out of sync? Try adjusting sync settings in TiviMate or check your emulator’s settings.
Connection Issues
Connection problems can come from your IPTV provider or network settings.
IPTV Provider Connection Errors
Make sure your IPTV subscription is active and use the right server details in TiviMate.
Network Troubleshooting
Check your internet for any issues. Restarting your router or adjusting network settings might fix connectivity problems.
| Issue | Potential Cause | Solution |
|---|---|---|
| Emulator Crashes | Memory Issues, Graphics Driver | Allocate more RAM, Update Graphics Drivers |
| TiviMate Won’t Install/Launch | Compatibility Issues, Google Play Services | Check Emulator Compatibility, Update Google Play Services |
| Playback Issues | Buffering, Audio/Video Sync | Check Internet Speed, Adjust Sync Settings |
| Connection Issues | IPTV Provider Errors, Network Issues | Verify IPTV Subscription, Troubleshoot Network |
Keeping TiviMate Updated on Windows11
To get the most out of TiviMate IPTV Player on Windows11, updating it regularly is key. Updates bring new features, better performance, and security fixes.
Checking for TiviMate Updates
To find updates, check the Google Play Store if you installed TiviMate through an emulator. Or, look for APK updates manually. Staying updated means you won’t miss new features or security patches.
Update Process Through Google Play
For updates through an emulator like BlueStacks or LDPlayer, use the Google Play Store. Just open it, search for TiviMate, and click ‘Update’ if it’s available.
Managing APK Updates Manually
For manual updates, download the latest APK from a trusted source. Here’s how:
- Finding the Latest Version: Make sure you download the newest TiviMate version from a reliable site.
- Safe Update Procedure: Uninstall the current TiviMate (if needed), then install the new APK. Always save your settings before uninstalling.
Finding the Latest Version
To find the newest TiviMate version, check the official TiviMate website or a trusted APK repository. Look for the version number and release date to confirm it’s the latest.
Safe Update Procedure
Before updating, save your EPG data and settings. Then, uninstall the current version and install the new APK. This makes the update smooth.
| Update Method | Steps Involved | Advantages |
|---|---|---|
| Google Play Store | Open Google Play Store, search for TiviMate, click ‘Update’ | Easy, automatic updates |
| Manual APK Update | Download latest APK, uninstall current version, install new APK | Control over update version, useful if Google Play update is delayed |

By following these steps, you can keep your TiviMate IPTV Player updated on Windows11. This way, you’ll always have the latest features and security updates.
Alternative IPTV Players for Windows11
Windows 11 offers a variety of IPTV players to improve your viewing experience. TiviMate is well-liked, but other native apps and web solutions also have great features and work well.
Native Windows IPTV Applications
Looking for something other than TiviMate? Native Windows IPTV apps give a smooth viewing experience. Here are two good options:
MyIPTV Player
MyIPTV Player is made for Windows and is easy to use. It works with many IPTV providers and lets you customize settings for a better watch experience.
VLC Media Player
VLC Media Player is great for streaming IPTV. It plays lots of file formats and streams from different sources, making it a favorite among users.
Web-Based IPTV Solutions
Web-based IPTV solutions are flexible and easy to use. They let you watch IPTV content in a web browser or through progressive web apps.
Browser-Based Players
Many IPTV providers have browser-based players. You can access them in a web browser without needing extra software.
Progressive Web Apps
Progressive web apps give a native app-like experience for IPTV streaming. They offer features like offline support and push notifications, making your experience better.
Comparison with TiviMate Experience
When comparing these IPTV players to TiviMate, think about compatibility, features, and how easy they are to use. TiviMate is great on Android, but these alternatives might be a better choice for Windows 11 users. They could meet your specific needs better.
Conclusion
We’ve shown you how to install TiviMate IPTV Player on Windows11. Now, you can watch your favorite IPTV channels on a bigger screen. Using an Android emulator like BlueStacks, LDPlayer, or NoxPlayer makes it easy to install TiviMate IPTV for PC and enjoy top-notch streaming.
TiviMate IPTV Player offers a wide range of channels and a simple interface. The setup is easy, and the right emulator can enhance your streaming. This guide helps you install TiviMate IPTV Player on Windows11 for personal use or to share with others.
By following this guide, you can now set up TiviMate IPTV Player on Windows11 for endless streaming. We’ve covered everything you need to know, from system requirements to configuration settings. Start watching your favorite channels today with TiviMate IPTV for PC!